
Please be aware that this blog post contains affiliate links and any purchases made through such links will result in a small commission for me (at no extra cost for you).
Waterproof Stickers

Have you seen all the people around with cool stickers on their water bottles and you really want some to?! Same here! I was really wanting some custom stickers and so I looked on Amazon and found some printable waterproof sticker vinyl! It works great! So I am making a DIY or buy post today for you!
How DIY or buy works (I stole the idea from Vintage Revivals) is I will post the tutorial here and you can either make them yourself with the steps OR you can just pop on over to my Etsy shop and buy some there. I feel like that works for everyone!
Buy the finished stickers here
Supplies you’ll need to DIY
- Silhouette (or other cutting machine or scissors if you cut really well)
- Printable Vinyl (click here for the kind I used)
- Clear Vinyl
- Printer (this vinyl does inkjet or laser!)
- SVG/PNG Files for the stickers (you can buy them here or make your own)
- Something cute to stick them on
How to make the stickers
Go into Silhouette Studio and design your stickers. My designs are in a bundle on my Etsy Shop here if you want to have the same as I do!
Make sure that you go to the Page Setup tab on the right side of the screen. It is the little icon that looks like a piece of paper at the top. Then at the very top of the open panel there is a little icon that looks like a piece of paper with a square and L shape marks in the corner. Click on that and turn on your registration marks. 
This is how you’ll print and cut. Now, I was terrified to do a print and cut because it sounded so complicated when I first started. DO NOT BE AFRAID! It is really just as complicated as turning on the registration marks. While you’re in the Page Set up, make sure you also have all of the page settings correct so it will print correctly. Here is what it will look like with the registration marks on and set up to cut without a mat.
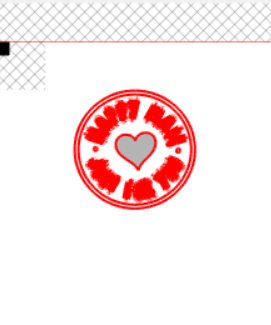
Next you position the stickers in the white space between the red lines. Make sure that the designs also stay out of the grey crosses area because the silhouette machine needs to read the black marks and there will be an error if you have design too close. Here is how mine look.
Then send it to print! it will print with the black square and the two black L shapes in the corners, but the grey lines and red lines won’t be there. After they are printed, you can send them to cut in your Silhouette machine. The machine will read the black marks first and then cut on the red lines.
If you design your own stickers in Silhouette Studio, you’ll need to make sure that there are no cut lines inside of the sticker. It will ruin the stickers and it’s so sad! If the cut lines are on it will look like this when you send it to cut if you need to change it.
When it is printed, put the clear vinyl over the top. It will keep the colors from running. Try to avoid putting it over the registration marks so the machine can read them correctly.
Usually I just move the inside stuff out of the print area and then use the undo button to put them back after they cut. If they are good for cutting it will look like this.
Then you can just weed off the extra vinyl and use your stickers! The vinyl I got needed to cure for 3 days so that the print won’t come off, but I hand washed it right after and it worked so well. I am so happy with it!
If you want to stick your stickers on your car window or outside, it is best to get a UV safe vinyl to go over it or spray it with a UV protection spray to spray over the top. You can also get a clear vinyl to protect the ink and put it in the dishwasher. It is very cool!
That’s all there is to making stickers! It is so fun!


Since I love to make them so much, I added them to my Etsy shop. If you want to buy them you can go here.

Pingback: New Waterproof Sticker Designs – Crafting Overload