
Have you ever seen a chair at a thrift store or a yard sale and thought how cute it would be if it didn’t have such dirty fabric on the seat? I totally have! This last week, my sister-in-law’s family was having a huge yard sale! I went and got some cute tables (they will be in a post next week), and I saw some darling chairs but they were in rough shape. I passed them up at the sale, but everyone passed them up at the sale! My brother asked me if I wanted them and of course I said yes! My plan is to sand and stain the wood sections and I recovered the rough fabric seats.
That is what my blog post is about today! Recovering the seats! Here are some great before pictures so you know what I am working with!


Take a good look at that HUGE hole!
First, I took the seat off. To do that, you turn the chair over and look for the screws that are holding the seat on. All you have to do is take those off and the seat comes right off. Easy easy easy!
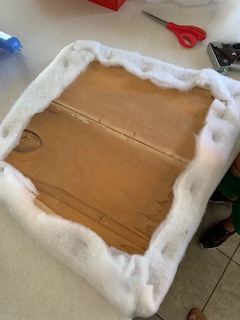
Then I got some batting and cut it out to fit over the seat. Like I’m wrapping a present. I used a heavy-duty furniture staple gun (from Joann Fabric) to tack the batting in place. and pulled tight.

After the batting was on I pulled out the fabric. I picked this print from Joann Fabric and I think it will be so cute with a natural wood color on the chair and highlights the mid century-modern look I am going for. When I buy fabric to cover kitchen chairs, I plan on needing about 3/4 of a yard for each seat.
When I am stapling the fabric down, I always start at the back side of the seat and staple the fabric down all the way across. Then I can turn it over and make sure there are no wrinkles while I’m folding the corners. The corners are exactly like wrapping a present. I fold it down one way and then the other. Once it looks the way I want, I staple it down on the back.


My next steps are always to do both of the sides and leave the front side for last. I look for everything to be smooth so the front will look nice. After I have all of the sides stapled, I go around and trim down all the batting and fabric so it won’t be hanging down where you can see it under the chair. Because that would be weird.

If you have messy kids and don’t want to have plain fabric on your kitchen chairs, you can also add a layer of clear vinyl over the top. They sell it at Joann Fabric as well and it keeps the fabric nice and clean!

Here is the picture of the seat finished on the chair. I haven’t got to sand and stain the chair yet, so watch out for the final chair picture later! I love to add a little color to a space this way! Tell me what you think! If you try to recover your kitchen chairs, I’d love to see them to! Use the hashtag #craftingoverload so I can see what you’re working on! I’d love to share it!
