I was searching through ideas on Pinterest on what I could make with my scroll saw, and I saw a image of a wooden ring. I have always thought making a ring would be so fun, but forming the metal is kind of terrifying to me! I hope one day I’ll get over that fear (probably when I can afford the tools to actually do it). So since I happen to have a scroll saw and some scrap pieces of cherry wood from my teething toys (that post here), I gave it a try while my baby took her afternoon nap.
To start, I took my ring and drew and inside circle. Then I drew a circle around that. I had to drill a few holes in the middle so that I could get the scroll saw blade in to cut the center hole.

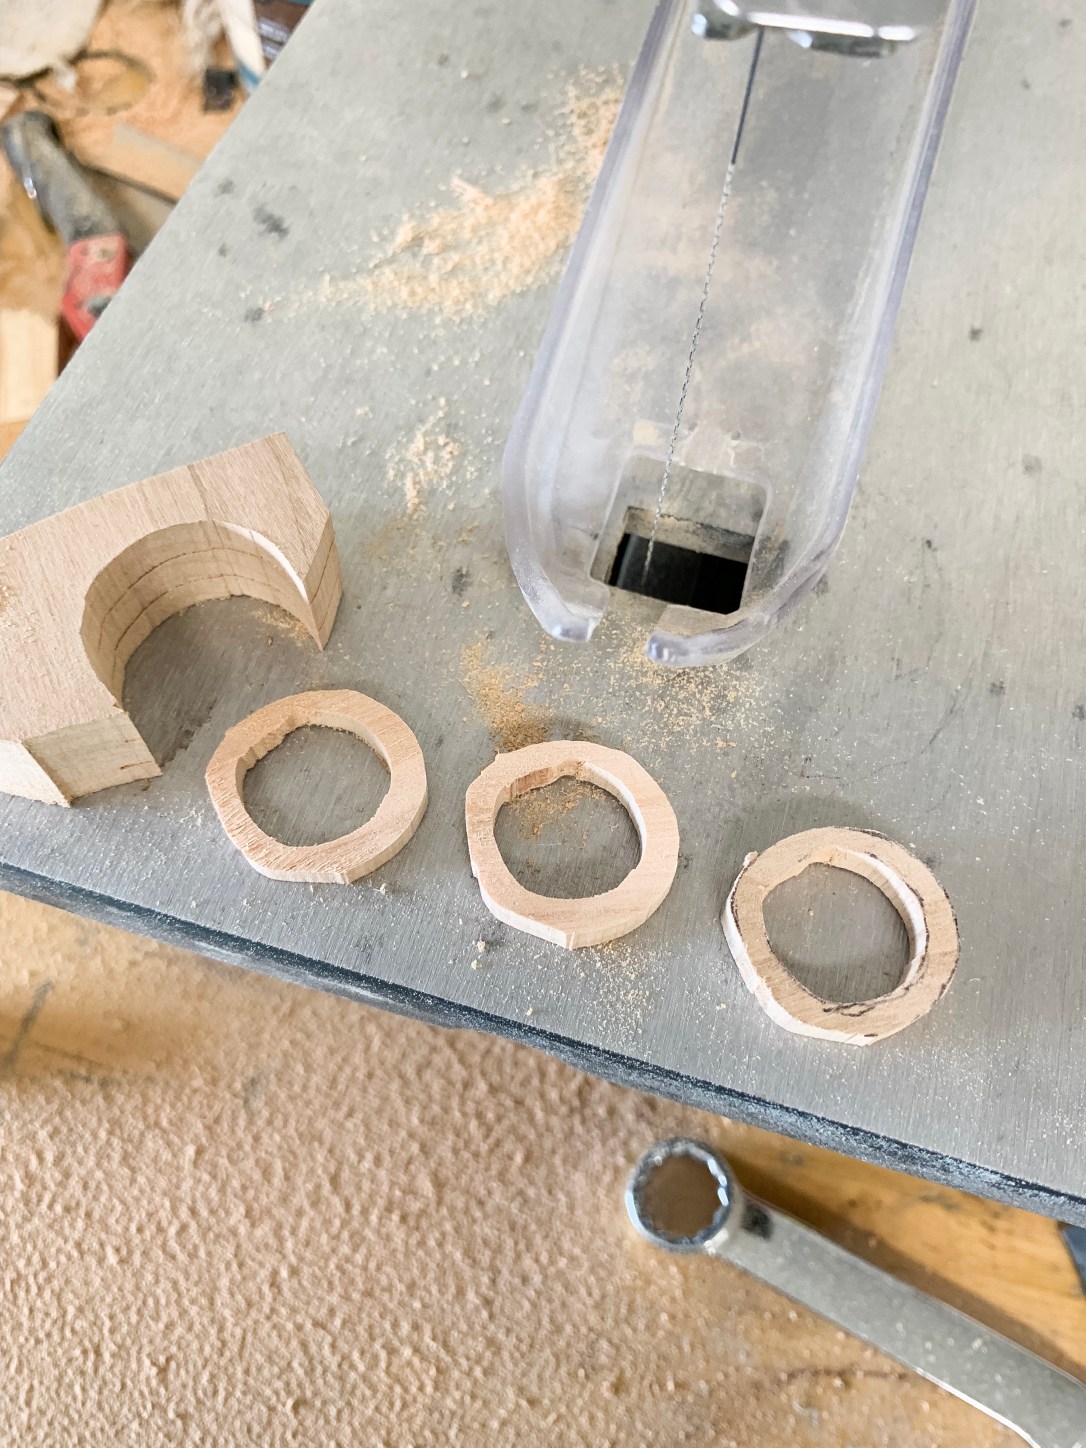
After the center was cut, I cut around half of the outside. I then turned it on it’s side and cut it twice to create 3 layers of wood. That made my ring 1/4 inch tall.


Then I finished cutting around the outside circle. This gave me 3 really rough looking rings.

I used my 6 dollar rotary tool from Harbor Freight to sand all around the outside and the inside of the ring and it really took shape at this point!


Then I used some 220 grit sandpaper to get rid of some sanding marks and then I used some really fine sandpaper after that to make it look smoother. The rotary tool came in handy again so that I could polish it!
I like how it turned out! I think it would look even better if I could add some wood burning details next! If I make another, I will try to make it a little thicker so I could sand it better and prevent breakage.


If you like this tutorial, I’d love it if you shared it on your favorite social media! Thank you so much for following me!

That’s brilliant, such a great idea. Well done.